Handmade Modern Hanbok - 손으로 만든 생활 한복
Recently, I've been seeing a lot of people wearing modernized versions of hanbok, the traditional Korean style of dress. Some people wear quilted versions in the winter as house clothes, and other people wear hanbok tops with normal skirts to create an even more modern look.
Since I've gotten into sewing, I wanted to challenge myself by making a modern "daily" hanbok for myself. It was definitely a challenge, but I learned a lot about sewing, measuring, cutting, and about fabric and sewing techniques.
Once I get the hang of making them, I'd like to create a step-by-step guide for how to make this type of hanbok. I mostly relied on Korean tutorials, which I couldn't fully understand, and English guides on making traditional hanbok, which are quite different. I'll try making a summer daily hanbok soon, but for now, I'll explain the process that went into making my spring version of a modern hanbok.
First, I went to pick out fabric at the traditional market near Daejeon station. There are hundreds of shops there selling inexpensive goods, and for crafty people, it's the place to go. They have buttons and buckles and everything in between. There are fabric stores, thread and needle stores, and stores for yarn and stuffing, too.
My crafty friend took me to the market and we asked the shopkeeper for modern hanbok-type fabric. They knew what I meant right away and helped me find fabric that looked natural and light. I chose a pretty floral blue pattern for my top, and then went in search of a light pink for the skirt. Then I found a darker pink for the ribbon. After that, I had to buy white material for the lining and some interfacing to strengthen the part that goes around my waist. Then we went to another shop to buy matching thread.
I started on my skirt on the weekend, and it was much harder than I thought it would be. I followed a tutorial that was all in Korean, and the pictures didn't explain everything, so I got confused when it came to how to do the waist. I eventually worked it out, but my finished product was not fitting properly. The material bunched up together when I tried to tie it, and it still felt out of place when I moved.
Confused, I told my Korean friend about my troubles, and she read the tutorial I'd been using to check what the woman who made hers did. My friend told me that I was not supposed to sew the sides together, and that the skirt was meant to wrap around itself. I was frustrated, but I went home and took out the side seams, sewed up the two sides, and redid my buttonhole.
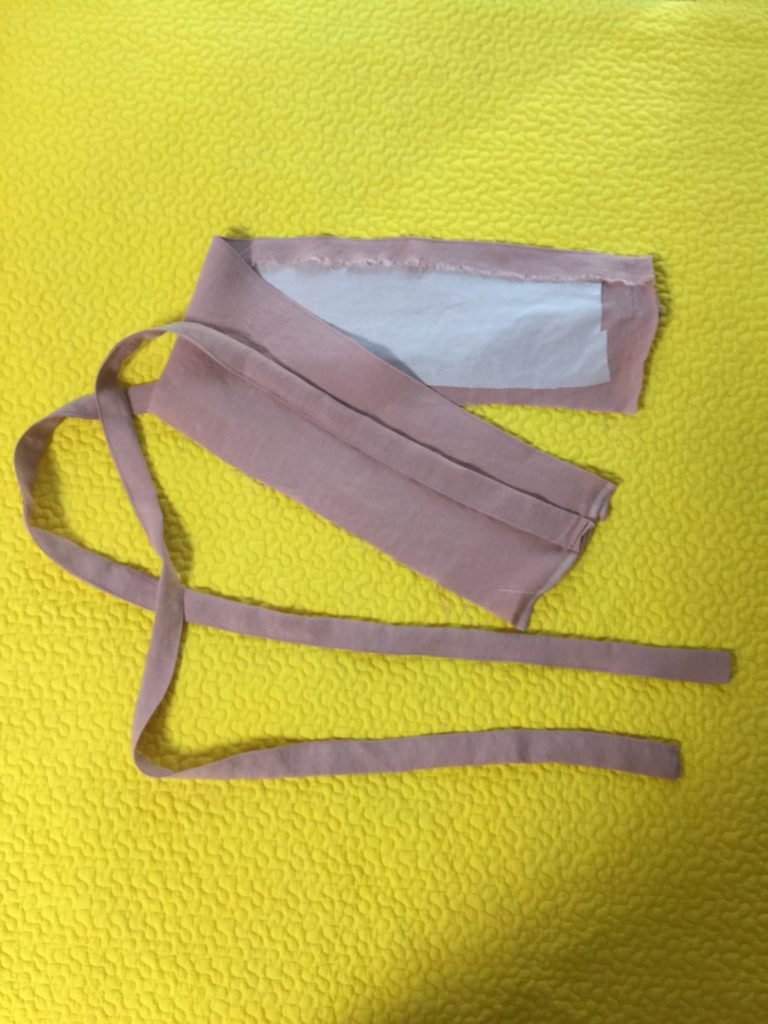
The buttonhole allows one of the straps to go under the fabric and come out on the other side so that it can be tied into a bow with the other strap. It also helps the wearer adjust the size. Thankfully, my little IKEA sewing machine can do buttonholes, but it was panic-inducing trying to sew them correctly.
My skirt isn't the most pretty thing I've ever made, but next time I know exactly how to do it. It basically requires three pieces of fabric, plus some fabric for the straps. The waist is two identical pieces put together, and the skirt is a long, wide piece of material that is pleated and sewn into place. The straps are sewn into the waistband, and once the skirt is completed, one can wear it to decide where the buttonhole should go.
Once I was done with my skirt, I was pretty proud of it, but I still needed to make the top. I was feeling nervous about it, so I put it off for a few weeks. I didn't want to make all the mistakes I made with my skirt on the top as well, but I knew that mistakes were inevitable. I found a handful of tutorials but none of them were exactly what I wanted, so I chose techniques from all of them. Some patterns had straight sleeves, others had set-in sleeves, which I had never heard of before.
I decided to do set-in sleeves, and I found out that they are actually pretty easy. However, the most time-consuming part was drawing out my pattern onto my fabric. After I ironed all the fabric for the top and the lining, I put it on the floor and stared at it for a good while. I took my measurements, and drew a little sketch of everything on a scrap of paper. I decided on the shape of my sleeves and the body and eventually I took out my pen and scissors and got to work.
I knew everything had to be exactly even and symmetrical, so I decided to tape some paper together to make a pattern before cutting out the sleeves or body. That turned out to be a great idea, because now when I want to make another, I have everything already measured out. I found my traditional hanbok top and measured it, tweaking it because the sleeves are way wider on it than on normal tops, and mimicked that when making the cutout.
Unfortunately, I didn't give myself enough room in the back, because once I started sewing on the sleeves and tried it on, the top of the back ripped. It was way too small. I cut a slit down the back and made a little piece of fabric to give me some extra inches of room. I took the inspiration from my traditional hanbok, which had a similar back feature. Mine is much bigger, but since I used the same material, it doesn't sand out much.
I also sewed the sleeves on incorrectly a few times. The first sleeve, I sewed on before I sewed up the sides. Then, when I went to sew up the sides, there was a weird hole that was impossible to get rid of without making the armpit of the sleeve look strange. I took out the side seam and part of the sleeve seam and tried again. This time, I sewed up the side first and then the sleeve fit nicely into the hole. The second sleeve, I sewed on inside out, so I had to redo that one as well.
However, even after all that sleeve reworking, I found out that I really don't mind doing sleeves. They are quick and pretty painless. The front of the top wasn't that bad, and thanks to the cut outs I made, they were exactly the same. I sewed on the lining for everything and then sewed it together, but I saw some tutorials where the person made the lining and the outside separately and attached them at the end. I prefer the way I did it.
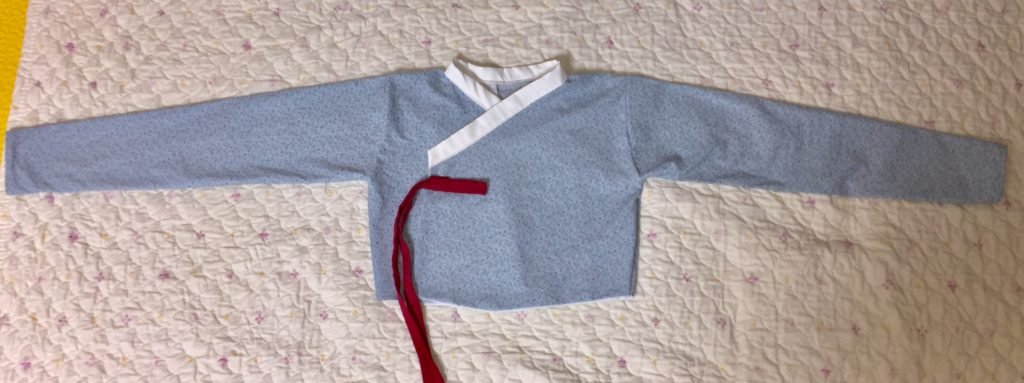
I originally was going to make the neckband the same color as the jacket, but then I decided to make it white. It wasn't as hard as I thought it might be, but I sewed it on twice and ended up taking the first line of sewing out, because it was blue and really noticeable.
At the end, I made thin strips of dark pink fabric for the ribbon and sewed it on so that I never have to tie it. Most traditional hanbok feature two strands of material that you tie together after you put it on. Instead, I sewed snaps where I wanted the front pieces to meet, and it's easy to put on and wear.
The skirt sits high on my waist, so the jacket is shorter than normal tops. I wore the ensemble out when my friends and my husband and I went to Wonju to ride the rail bikes and visit a museum. The weather was nice, and I felt really comfortable wearing my hanbok, though I did notice more stares than I normally get. I think many Koreans who saw me must have been surprised to see a foreigner in a modern hanbok.
Now that I've built my confidence up, I'd love to try again with all the knowledge I have on making these modern hanbok. I love that it gives me the chance to learn new sewing skills and embrace more of Korean culture. I might even make one for Junkyu, if he'll agree to wear it!


